Skip To Navigation Skip to Content
Individuals & Caregivers
Physical & Occupational Therapy
Public Health Professionals
Teachers
Individuals & Caregivers
Physical & Occupational Therapy
Public Health Professionals
Teachers
Individuals & Caregivers
Physical & Occupational Therapy
Public Health Professionals
Teachers
Individuals & Caregivers
Physical & Occupational Therapy
Public Health Professionals
Teachers
Individuals & Caregivers
Physical & Occupational Therapy
Public Health Professionals
Teachers
Individuals & Caregedivers
Physical & Occupational Therapy
Public Health Professionals
Teachers
Individuals & Caregivers
Physical & Occupational Therapy
Public Health Professionals
Teachers
Individuals & Caregivers
Physical & Occupational Therapy
Public Health Professionals
Teachers
Individuals & Caregivers
Physical & Occupational Therapy
Public Health Professionals
Teachers
Individuals & Caregivers
Physical & Occupational Therapy
Public Health Professionals
Teachers
Individuals & Caregafgivers
Physical & Occupational Therapy
Public Health Professionals
Teachers
Individuals & Caregivers
Physical & Occupational Therapy
Public Health Professionals
Teachers
Individuals & Caregivers
Physical & Occupational Therapy
Public Health Professionals
Teachers
Individuals & Caregivers
Physical & Occupational Therapy
Public Health Professionals
Teachers
Individuals & Caregivers
Physical & Occupational Therapy
Public Health Professionals
Teachers
 

NCHPAD - Building Healthy Inclusive Communities

Font Size:

From Arrival to Entering


Accessibility for your disabled visitor starts with the routes from parking areas, drop-off points or gates.

A flat entrance of a museum.
The type of surface and width of path are very important. The materials used need to be stable, firm and slip-resistant. The path or route should be a minimum of 36 inches. A wider width of 60 inches allows for people to walk with someone using a wheelchair and provides passing space and easier maneuverability.

Exterior areas have unique seasonal issues. Outdoor paths must be cleared of snow, ice, and wet leaves to keep people from slipping. In addition, objects should not protrude into the path below 80 inches. The objects can go undetected by persons with a visual impairment using canes until they strike them.

Items such as tree branches and bushes can re-grow and must constantly be trimmed back. Curb ramps might be used along the accessible route. These ramps provide the transition from the street to a sidewalk. These types of ramps are short and textured; some have flared sides. The textured concrete alerts people with visual impairments using canes that they are coming to a street.

Accessible parking spaces should be located nearest the accessible entrance, properly marked with signage and correctly spaced. The intent is to minimize the amount of walking and clearly indicate their location.
Getting to an entrance may require a stair, lift or ramp to enter. The best design is a level entrance with the walkway. (See Figure 2.) Ramps with appropriate handrails provide good access but need to be cleared of slippery elements such as snow, ice, and leaves. Lifts can work, but mechanical means of access require constant care and can break down, literally leaving someone out in the cold.

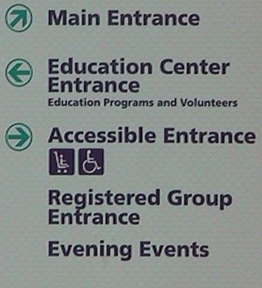
A main entrance signboard with clearly marked signs.
The doors of an entrance should provide clear openings and enough maneuvering space to pass through easily. The handles should be operational with a closed fist, typically with a lever or loop handle.

In addition, accessible entrances should be clearly marked with a sign. Inaccessible entrances should provide directional signage to the accessible entrances. (See Figure 3.) Making the main entrances accessible is strongly encouraged for all guests. This design allows for inclusive opportunities for everyone from the beginning of their experience.


blog comments powered by Disqus